Hello again, stamping friends! Well, I did intend to post yesterday, but time got away from me again!
I’ve been busy prepping for family birthday celebrations at our house this weekend, plus working on my swaps for Leadership, plus regular daily life! YOU know how it is, right?! Image may be NSFW.
Clik here to view.
I’m dying to show you the swaps that I’m working on, but I want to keep them secret, until I’ve handed them out at the Leadership convention – which is not until Jan. 29th!! *sigh* So, we’ll all just have to be patient….I hope you’re better at it than I am!
In the meantime – I’m joining my first challenge! A challenge is when a group of people (in this case other Stampin’ Up! demonstrators) form a group, and each week (or month) come up with a type of design challenge, in which other crafters participate. Sometimes they are a design or layout; sometimes a colour challenge, or a challenge to use a particular stamp set or product.
This one is by the Paper Craft Crew, and it is Card Sketch Challenge #127. You can find more information about the Paper Craft Crew Challenges just by clicking on their name.
Here is the sketch that we were to follow:
Image may be NSFW.
Clik here to view.
Here is my card, based on the sketch:
Image may be NSFW.
Clik here to view.
What do you think? This is the new Butterfly Basics stamp set and Butterfly Thinlits Dies. They are now available in the new Occasions Catalogue. The best part is that you can purchase the stamp set AND the framelits as a BUNDLE – and SAVE 15%! Plus you have 3 choices – you can get the stamp set in either Wood, Clear, or Photopolymer!
For this card I started with a Whisper White card stock base, then using the honeycomb stamp, created the background in Crushed Curry and Real Red ink. I then layered a strip of Flashback Designer Series Paper across the middle, just right of center. I created the little banners by hand cutting Crushed Curry card stock and another piece of the Flashback DSP. Using the medium butterfly thinlit (don’t you just love the detail cut out?), I used my Big Shot to cut 2 butterflies; one from Crushed Curry, one from More Mustard card stocks. I glued them together using Tombow Multipurpose Glue, and added them to the card front using a Stampin’ Dimensional. To finish it off, I tied a knot in a piece of Burlap Ribbon that I had cut in 1/2 length-wise, and added the 3 Candy Dots in the lower left hand corner.
So I’m quite please with my first challenge card; I hope to participate more in these types of challenges; they’re a great source of inspiration for layouts and colour combinations that one might not regularly use!
I have two more cards to share with you that uses the Butterfly Basics and Thinlits – they are not for a challenge, though!
Image may be NSFW.
Clik here to view.
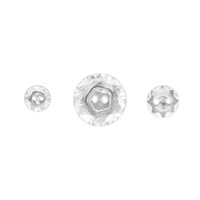
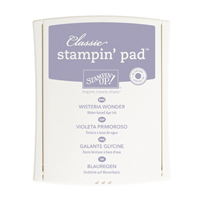
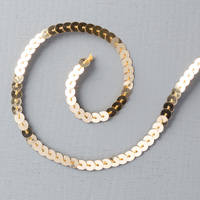
For this card I used almost all of the stamps in this set – there’s a whopping 11 stamps! I stamped the fern leaf in Pear Pizzaz and again in Old Olive ink, then stamped over those with the flower stamp using Rose Red for the flowers, and Pear Pizzaz for the stems and leaves. The border across the bottom and smallest butterfly were stamped in Wisteria Wonder; the center butterfly was stamped in Rose Red (though the flash has made it look a bit different), then cut it out using the Butterfly Thinlits Die. I added it to the card base using a Stampin’ Dimensional; a Glue Dot holds the Vintage Faceted Button tied with a bit of Baker’s Twine to the center of the butterfly. A few scattered Gold Sequins, a panel of Rose Red card stock and the whole card is complete!
If you haven’t seen them yet, here’s a picture of the complete stamp set, and the thinlits:
Image may be NSFW.
Clik here to view.
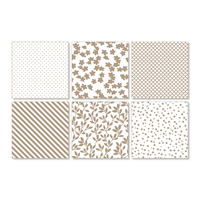
Finally, I want to share with you the gorgeous, largest butterfly thinlit – it reminds me of the Monarch butterfly in shape. Here’s a card I created using it, plus the gorgeous Irresistibly Yours DSP from the Sale-a-bration brochure:
Image may be NSFW.
Clik here to view.
Remember the tip I shared about using wax paper when cutting with detailed dies? You know – (1) Big Shot Platform, (2) Cutting Plate, (3) Card stock, (4) Wax paper, (5) Thinlit die, (6) Cutting Plate – then roll through the Big Shot. Well, the wax paper is a MUST when using these butterfly dies! You’ll be so happy you did – the littlest pieces virtually fall out! No more sitting & poking all the little pieces out for 1/2 an hour Image may be NSFW.
Clik here to view.
You can see that I used Basic Black card stock for the largest butterfly, and Silver Glimmer Paper for the medium one, and layered them together. The sentiment is stamped in Bermuda Bay ink, and punched out using the Labels Bracket Punch.
To create the background, I cut a panel of Irresistibly Yours DSP, then spritzed it using a mixture of rubbing alcohol and re-inkers, in our Spritzer bottles. First I spritzed with Strawberry Slush, then Crisp Cantaloupe, then Bermuda Bay. (I kept the Bermuda Bay light by adding less re-inker to the alcohol). Using alcohol allows it to dry much faster than if you used water, and doesn’t saturate the paper as much. Remember – you can get this fabulous paper FOR FREE during Sale-a-bration with any $60 order!
After layering all the pieces, I then added the card front to a base of Bermuda Bay card stock.
I’m having such fun with these new products, you’ll be seeing lots more projects with them, being used in different ways!
I hope you enjoyed today’s cards, along with my first challenge card! If you’d like to purchase any of the products I used in these projects, just click on the photo icon below, and you’ll be taken directly to my on-line store.
I hope you’ll click over to the Paper Craft Crew page to see what the designers created, as well as see the other challenge submissions. Just CLICK HERE and a you’ll be taken directly to the correct page. Thanks for looking – and wish me luck! Image may be NSFW.
Clik here to view.
Until next time – Happy Stamping!
Image may be NSFW.
Clik here to view.